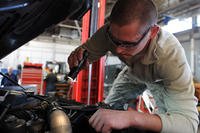
For people in the military, missing work because of car trouble isn’t really an option. Frequent permanent change-of-station moves require you to crisscross the country every few years. You may even have vehicle inspections standing between you and a long weekend, so proper maintenance is key.
Paying for preventative maintenance and surprise repairs at a dealership or independent mechanic is expensive. You can save thousands of dollars by doing the work yourself, and many military bases have an auto skills center or hobby shop where you can work on your car in a safe environment with all the tools you’re likely to need.
For military motorheads, the hobby shop is a little slice of heaven. If you’re new to wrenching, it can be intimidating, but here are five easy jobs to get you started. Master these, and you’ll be well on your way to automotive independence.
Change Your Air Filter

The first and easiest job to tackle is changing out your air filters -- one under the hood and one in the passenger compartment of your vehicle. You can do this in the parking lot, and you probably won’t need any tools.
Read Next: Should Service Members Own an Electric Vehicle?
After consulting your owner’s manual, simply open the airbox in your engine compartment (it’s likely only fastened with clips), remove the dirty filter and install the new one. It should drop right into place. Nothing about this is particularly hazardous, but surrounding components might be very hot, so it’s best to do this job after your engine has had time to cool off.

Your cabin air filter is almost always located in the back of the glove compartment. Check your owner’s manual, empty your glovebox and open the rear panel to reach the cabin filter. If it hasn’t been changed recently, you’ll be surprised by the amount of dirt, leaves, bugs and mystery debris lurking in there.
Both of these jobs are extremely affordable, especially when you aren’t paying $100 or more per hour for labor. They’re good for your car and will give you a nice boost in confidence before you move on to our next challenge.
Grease Your Car’s Joints

Ball joints, tie rod ends and bushings will cost you lots of money when they go bad, but you can extend their service life with a few dollars’ worth of grease.
If you have a tall vehicle, this is another job you can do while it’s parked, but it’s more convenient to use a lift. In this case, a four-post lift (the kind you drive onto) is fine, because you don’t need to remove your wheels.
All you need is a grease gun, which should be available at your installation’s auto skills center. Look for grease fittings on your upper ball joints, lower ball joints, tie rod ends, drive shaft and other chassis components. This is different for every vehicle, so you may not have all of these. Many newer vehicles use non-serviceable components.
Once you've wiped a fitting clean and attached the grease gun, pump fresh grease in until the rubber boot inflates and feels firm when you poke it.
A hobby shop employee will be able to point them out to you. They can also help you spot the difference between grease fittings and bleeder screws (which we’ll get to in a minute).
Rotate Your Tires

Over time and miles, your tires will all wear a little differently. They’ll eventually show problematic wear patterns, cause a rough ride and meet an early demise if you don’t intervene. Luckily, all you have to do is play a little game of musical chairs.
Rotating your tires is simple and doesn’t involve any messy fluids or specialized tools. It’s very tedious if you don’t have a way to get all four wheels off the ground at once, though, which is where your auto skills center comes into play.
Start by reserving a two-post lift -- the kind that raises your car by the frame or body rather than the tires. One of the hobby shop employees can show you how to use it safely.
Once your car is in the air, remove all four wheels and move them to their new homes based on your owner’s manual or the recommended pattern determined by your drivetrain and tires (front-wheel drive, rear-wheel drive, all-wheel drive, directional tires).
Removing lug nuts or bolts is straightforward, but your hobby shop’s impact wrench can make the job easier if they’re rusty or over-torqued. When you reinstall them, see whether you can find torque specs in the owner’s manual and use a torque wrench to make sure you use just the right amount of force.
If you do this at every oil change, you’ll get maximum mileage out of your tires. For those of you who run separate summer and winter tires, mark them with chalk with their original location when you take them off so you can execute a rotation the next time you install them.
Change Your Oil and Filter

Changing your car’s oil is one of the best things you can do for its long-term health. With a few tools and a four-post lift, you can do the job in just a few minutes. Use the manufacturer’s recommended oil and filter, which you’ll need to buy ahead of time at your local auto parts store.
Remove the oil filler cap and drain plug so the old oil can flow into the catch pan (the hobby shop will have one for you). It will be hot and very messy if you spill it, so be careful.
Once it stops, unscrew the oil filter and install the new one. Whether you should prime the new filter by filling it with fresh oil prior to installation is a hotly debated topic, so you’ll have to decide for yourself.
Install the drain plug (with a new crush washer, if required), and tighten it to the manufacturer’s torque spec using your hobby shop’s torque wrench. Pour the manufacturer-specified amount of new oil into the fill port on top of the engine (this may be a filler tube or a hole in the valve cover) and reinstall the cap.
Check for drips and give the underside of your car a quick inspection. This is a convenient time to pull out a flashlight and spot other leaks or signs of wear.
Replace Your Brake Pads and Rotors

Like motor oil, brake pads and rotors are consumable items. Replacing them is easy enough if you have the right tools and a little bit of time. Parts are more expensive than the ones we’ve covered so far, so expect to pay several hundred dollars for a set of OEM pads and rotors and more for high-performance aftermarket parts.
This job requires a two-post lift since you need to remove the wheels. It takes some attention to detail and may involve specialized tools (looking at you, Volkswagen, with your triple-square bits). This video gives a pretty good look at what’s involved.
Drum brakes are a little bit different. They’re uncommon these days, but you might need to deal with them if you drive an older vehicle. If you do, shop for the correct replacement drums and shoes instead of rotors and pads.
No matter which type of brakes you have, this is an important job to get right because your ability to stop is on the line. Consult with your hobby shop staff and torque everything to spec. Your new brakes may require a bedding period, so follow the pad and rotor manufacturer’s instructions closely for the best results.
Flush Your Brake Fluid

Brake pads and rotors will let you know when they’re ready to be replaced, because they’ll shudder, squeal or pull to one side. Brake fluid is more subtle; most people never think about it until their mechanic tells them its way past time for a flush.
When you push on your brake pedal, that force gets transferred to your brakes by fluid contained in a reservoir and small lines that connect to each brake caliper. Brake fluid is hydrophilic, meaning it absorbs water over time. That’s bad because when that water compresses, the fluid mixture ends up absorbing pressure rather than passing it on to your brakes. Basically, you lose the ability to stop.
The fix is very simple. Twist open a bleeder screw, push that old brake fluid out and replace it with fresh brake fluid as you go (your reservoir cap will specify which type of fluid to use). You can do it with specialized tools or a partner. It looks something like this.
Take your time. Keep an eye on your brake fluid reservoir so it doesn't run dry and introduce air into the system (if it does, you’ll have to start over to remove the bubble), and work on one caliper at a time. Doing this every two years should be adequate in most cases, but you can check it with a brake fluid tester from time to time to be sure.
Your hobby shop will have a place to dispose of your old brake fluid, which is important because it’s nasty stuff.
Be Your Own Motor T

Working on your own car can be daunting, but you don’t have to become a mechanic overnight. Start with these beginner-friendly maintenance items and tackle more difficult jobs as you get comfortable -- or not. There’s nothing wrong with hiring a professional.
Even the simplest tasks will give you a better understanding of how your car works, help you spot problems before they get too severe and save you money along the way.
Military service members and their families are lucky to have an auto skills center or hobby shop that provides the facilities, tools and friendly mentors to get the job done. Who knows, you might become the next Mike Ring.
Want to Know More About the Military?
Be sure to get the latest news about the U.S. military, as well as critical info about how to join and all the benefits of service. Subscribe to Military.com and receive customized updates delivered straight to your inbox.


